당신은 주제를 찾고 있습니까 “dism restore health – DISM /Cleanup-Image /RestoreHealth \u0026 SFC /ScanNow not Working Windows 10, 8 \u0026 7 | Fix All Errors“? 다음 카테고리의 웹사이트 https://hu.taphoamini.com 에서 귀하의 모든 질문에 답변해 드립니다: https://hu.taphoamini.com/photos/. 바로 아래에서 답을 찾을 수 있습니다. 작성자 ValiumMedia Tech 이(가) 작성한 기사에는 조회수 64,707회 및 좋아요 878개 개의 좋아요가 있습니다.
Open Start. Search for Command Prompt, right-click the top result, and select the Run as administrator option. Type the following command to repair the Windows 10 image and press Enter: DISM /Online /Cleanup-Image /RestoreHealth Quick note: If the command appears stuck, this is normal behavior.Under good conditions, the command will take about 10-20 minutes to run, but depending on circumstances it can potentially take over an hour.It is recommended to run SFC first. Then, run DISM /Online /Cleanup-image /RestoreHealth. SFC checks for Windows file integrity violations and tries to fix them. However, DISM is more effective at fixing corrupt Windows Operating System files.
Table of Contents
dism restore health 주제에 대한 동영상 보기
여기에서 이 주제에 대한 비디오를 시청하십시오. 주의 깊게 살펴보고 읽고 있는 내용에 대한 피드백을 제공하세요!
d여기에서 DISM /Cleanup-Image /RestoreHealth \u0026 SFC /ScanNow not Working Windows 10, 8 \u0026 7 | Fix All Errors – dism restore health 주제에 대한 세부정보를 참조하세요
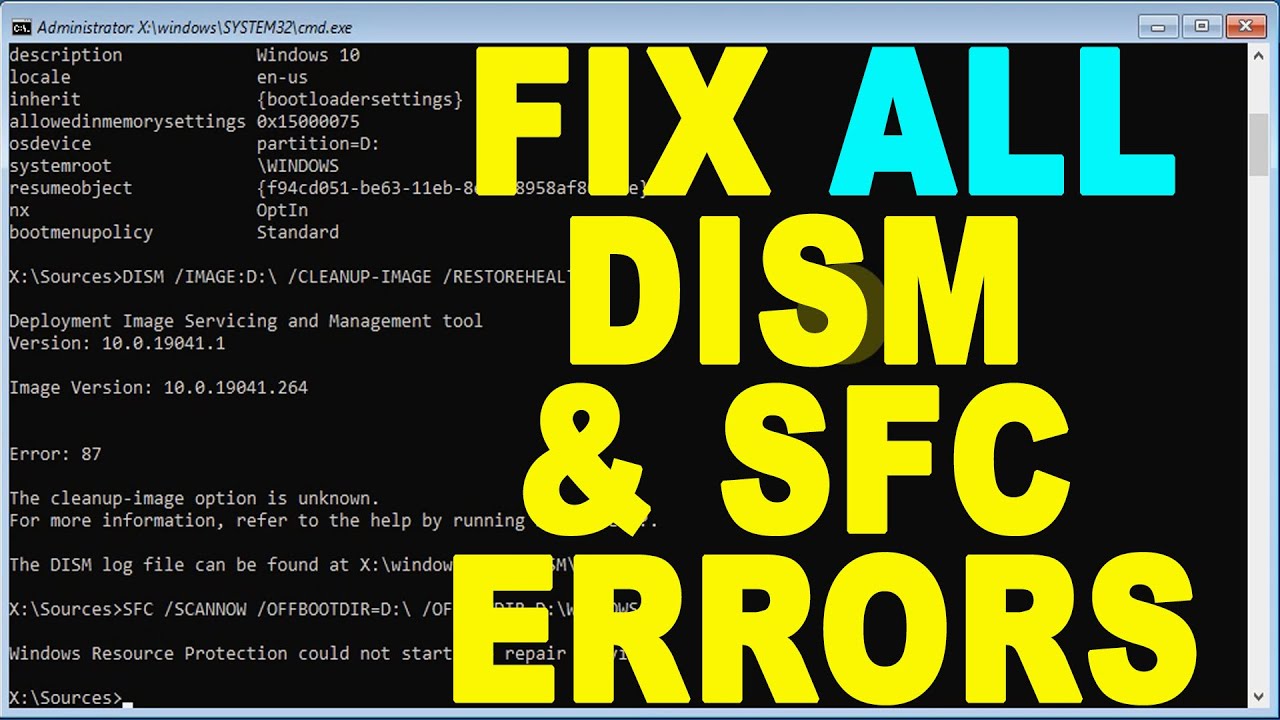
On this video, I will show you how to fix most common errors of DISM and SFC tools when trying to fix corrupted system files.
Example of common errors that can be fixed using this video:
sfc scannow windows 10 not working
sfc /scannow fails to fix, fails to run or fails to start
Windows Resource Protection could not start the repair service
windows resource protection could not perform the requested operation
dism error 0x800f081f the source files could not be found
error 87 dism, dism error 2, dism error 50, dism offline
dism does not support servicing windows pe with the online option
dism does not recognize the command-line option
dism does not start or doesn’t work
dism error 2 unable to access the image
dism error 740 windows 10
dism failed. no operation was performed 0x800f0831, 0x800f0950,
error 0x8000ffff, error 0x800f0831, error 0x800f0900
error 0x800f0922 dism failed. no operation was performed
dism failed no operation was performed windows 7
0x8024402c
dism error: 1
dism error 0x80080005
dism error 87 windows 10, windows 8 or windows 7
For more info, read this topic:
https://vmtechs.net/how-to-fix-all-of-dism-and-sfc-errors/
___________________________
IMPORTANT LINKS:
HOW TO CREATE BOOTABLE USB:
In Android Mobile:
https://youtu.be/4kZuUDl7pLA
In computer:
https://youtu.be/5gsRer7i0hs
HOW TO REPAIR WINDOWS RECOVERY ENVIRONMENT:
https://youtu.be/IpkpgqpwaIo
How to Boot into Advanced Recovery Environment :
https://youtu.be/Mqjy4sOQhi4
HOW TO FIX AUTOMATIC REPAIR LOOP SRTREIL.TXT BLUE SCREEN:
https://youtu.be/1SJr5aSDCE8
Donation link:
Paypal.me/ValiumMediaTech
___________________________
Solutions:
The following commands will fix the simple errors, such as, sfc /scannow \”system resource protection could not perform the requested operation\”
Or
DISM /online /Cleanup-Image /RestoreHealth \”not working\
dism restore health 주제에 대한 자세한 내용은 여기를 참조하세요.
Cách sửa image Windows 10 với DISM – QuanTriMang.com
Hoặc để ngăn DISM sử dụng Windows Update cho image online. Repair-WindowsImage -Online -RestoreHealth -Source “Full Path to install.esd file:< ...
Source: quantrimang.com
Date Published: 1/8/2021
View: 2493
DISM.exe /Online /Cleanup-Image /Restorehealth commands
DISM.exe /Online /Cleanup-Image /Restorehealth” is a Dism command that runs a scan for corruption and repairs problems that it finds with …
Source: www.insidenetwork.com
Date Published: 10/17/2021
View: 5333
Repair a Windows Image – Microsoft Docs
When you use the DISM tool to repair an online or offline image, you can use the /Source argument with the /RestoreHealth argument to …
Source: docs.microsoft.com
Date Published: 7/24/2022
View: 4514
Sử dụng công cụ DISM để sửa Windows bị lỗi – Chuyên trang …
Công cụ DISM có ba tùy chọn chính để sửa chữa Windows 10 Image, bao gồm “CheckHealth“, “ScanHealth” và “RestoreHealth“.
Source: hotromicrosoft.com
Date Published: 2/22/2022
View: 9120
DISM.exe /Online /Cleanup-Image /Restorehealth Explained
The last switch in “DISM.exe /Online /Cleanup-Image /Restorehealth” command is the /Restorehealth switch. The /RestoreHealth switch scans the Operating System …
Source: www.itechguides.com
Date Published: 10/22/2022
View: 1265
How To Use The DISM Restore Health Command To Repair …
The Restorehealth switch in a DISM command tells the tool to scan the running operating system for corrupt files and attempt to repair them …
Source: www.minitool.com
Date Published: 1/24/2021
View: 3805
How to use DISM Command to Repair Windows – LazyAdmin
DISM Online Cleanup Image Restorehealth … To restore the health of your Windows installation we first need to check for any corrupted files. For …
Source: lazyadmin.nl
Date Published: 2/24/2022
View: 5219
How to Repair a Windows Image Using the DISM
However, if you’re repairing an online image with your sources, enter this command instead: Dism /Online /Cleanup-Image /RestoreHealth …
Source: mspoweruser.com
Date Published: 5/12/2022
View: 8624
Run DISM command line To Fix And Repair Windows system …
Run DISM restore health Command … And the DISM command with the /RestoreHealth switch scans the Windows image for any corruption and performs …
Source: howtofixwindows.com
Date Published: 12/19/2021
View: 8486
주제와 관련된 이미지 dism restore health
주제와 관련된 더 많은 사진을 참조하십시오 DISM /Cleanup-Image /RestoreHealth \u0026 SFC /ScanNow not Working Windows 10, 8 \u0026 7 | Fix All Errors. 댓글에서 더 많은 관련 이미지를 보거나 필요한 경우 더 많은 관련 기사를 볼 수 있습니다.
주제에 대한 기사 평가 dism restore health
- Author: ValiumMedia Tech
- Views: 조회수 64,707회
- Likes: 좋아요 878개
- Date Published: 2021. 6. 3.
- Video Url link: https://www.youtube.com/watch?v=qHEvjMovfBg
How much time does dism restore health take?
Under good conditions, the command will take about 10-20 minutes to run, but depending on circumstances it can potentially take over an hour.
Is DISM Online cleanup image RestoreHealth safe?
It is recommended to run SFC first. Then, run DISM /Online /Cleanup-image /RestoreHealth. SFC checks for Windows file integrity violations and tries to fix them. However, DISM is more effective at fixing corrupt Windows Operating System files.
Can I use DISM in safe mode?
windows 8.1 (upgraded from 8.0) would not to Windows Updates. It seems the files would download but never complete.
Can I stop DISM restore health?
You can abort DISM which should not hurt anything But to be sure run System File Checker from Step 10 in this checklist: http://answers.microsoft.com/en-us/windows/wiki…. It also shows how to get around problem in DISM in that step.
Do I run DISM or sfc first?
SFC will scan the integrity of all protected operating system files, including those that are not on your hard drive. It should be used before running DISM.
How do you know when DISM is finished?
- Open Start.
- Search for Command Prompt, right-click the top result, and select the Run as administrator option.
- Type the following command to perform a quick check and press Enter: DISM /Online /Cleanup-Image /CheckHealth.
Does DISM RestoreHealth require reboot?
Compare to dism /Online /Cleanup-Image /RestoreHealth, /NoRestart parameter only suppresses reboot. If a reboot is not required, this command does nothing. This option will keep the application from prompting for a restart (or keep it from restarting automatically if the /Quiet option is used).
Why does dism take so long?
The main reason why it takes so long is that it compares the damaged files to healthy files and it creates a log on your PC. As for the exact time, several sources stated that the DISM scan health takes about 2 minutes on their PC, but that can change depending on the number of damaged files.
What will DISM do?
Deployment Image Servicing and Management (DISM.exe) is a command-line tool that can be used to service and prepare Windows images, including those used for Windows PE, Windows Recovery Environment (Windows RE) and Windows Setup. DISM can be used to service a Windows image (. wim) or a virtual hard disk (. vhd or .
Does SFC Scannow fix anything?
The sfc /scannow command will scan all protected system files, and replace corrupted files with a cached copy that is located in a compressed folder at %WinDir%\System32\dllcache. The %WinDir% placeholder represents the Windows operating system folder.
Can DISM work offline?
When you use the DISM tool to repair an online or offline image, you can use the /Source argument with the /RestoreHealth argument to specify additional repair source locations to use to search for the required files.
How do I repair Windows 10 using DISM offline?
Open your PC’s Start menu, go to Command Prompt, and enter the right command. If you’re trying to repair an offline image with the help of a mounted image as a repair source, the proper command to use would be Dism /Image:C:\offline /Cleanup-Image /RestoreHealth /Source:c:\test\mount\windows.
Can I cancel a DISM command?
Hi natividadjb, simply restart your PC to cancel the previously run command – no harm will come from restarting your PC while that command was running . . . Power to the Developer!
How do I fix corrupted files on Windows 10?
- Use the SFC tool. 1.1 Run System File Checker. …
- Use the DISM tool. …
- Run a SFC scan from Safe Mode. …
- Perform a SFC scan before Windows 10 starts. …
- Replace the files manually. …
- Use the System Restore feature. …
- Reset corrupted Windows 10.
How to use DISM command tool to repair Windows 10 image
On Windows 10, the Deployment Image Servicing and Management is a command-line tool that allows administrators to prepare, modify, and repair system images, including Windows Recovery Environment, Windows Setup, and Windows PE (WinPE). However, you can also use it with the local recovery image to fix system problems.
Typically, when you need to troubleshoot a specific error, figure out why the computer no longer boots correctly, or resolve performance issues, you can use the System File Checker tool to replace missing or corrupted system files using the recovery image. The caveat utilizing this approach is that if one or more Windows 10 files in the local image are damaged, the SFC command won’t work. In this scenario, you can use the “install.wim” image with DISM to repair the image and then use the SFC tool to fix the setup without having to reinstall Windows.
In this Windows 10 guide, we will walk you through the steps to use the DISM and SFC tools to bring a computer back to a healthy working state without the need for reinstallation.
Warning: The commands outlined in this guide are non-destructive, but since you will be making system changes, it is still recommended to create a temporary full backup before proceeding.
How to use DISM to repair image of Windows 10
On Windows 10, the DISM command tool includes three options to repair an image, including “CheckHealth,” “ScanHealth,” and “RestoreHealth,” which you want to use in order. Also, depending on the issue, you can use the “RestoreHealth” option to fix the locally available image using different source files.
DISM command with CheckHealth option
The CheckHealth option with the DISM tool allows you to determine any corruptions inside the local Windows 10 image. However, the option does not perform any repairs.
To check the Windows 10 image for issues with DISM, use these steps:
Open Start. Search for Command Prompt, right-click the top result, and select the Run as administrator option. Type the following command to perform a quick check and press Enter: DISM /Online /Cleanup-Image /CheckHealth
Source: Windows Central (Image credit: Source: Windows Central)
Once you complete the steps, the Deployment Image Servicing and Management tool will run and verify any data corruption that may require fixing.
DISM command with ScanHealth option
The ScanHealth option does a more advanced scan to find out whether the image has any problems.
To check image problems with the ScanHealth option, use these steps:
Open Start. Search for Command Prompt, right-click the top result, and select the Run as administrator option. Type the following command to perform an advanced DISM scan and press Enter: DISM /Online /Cleanup-Image /ScanHealth
Source: Windows Central (Image credit: Source: Windows Central)
After you complete the steps, the scan may take several minutes to check whether the Windows 10 image needs repairing.
DISM command with RestoreHealth option
If there are problems with the system image, use DISM with the RestoreHealth option to automatically scan and repair common issues.
To repair Windows 10 image problems with the DISM command tool, use these steps:
Open Start. Search for Command Prompt, right-click the top result, and select the Run as administrator option. Type the following command to repair the Windows 10 image and press Enter: DISM /Online /Cleanup-Image /RestoreHealth Quick note: If the command appears stuck, this is normal behavior. After a few minutes, the process will complete successfully.
Source: Windows Central (Image credit: Source: Windows Central)
Once you complete the steps, the tool will connect to Windows Update online to download and replace damaged files (as necessary).
Fix problems with DISM using install.wim image
The Deployment Image Servicing and Management command usually doesn’t cause issues. However, if the tool finds problems replacing the damaged files or the computer isn’t connected to the internet, you will need to provide another image using the Source option. Typically, you can use an “install.wim” or “install.esd” file from another device, bootable install media, or Windows 10 ISO file. You only need to make sure that the files match the version, edition, and language of the version of Windows 10 you are trying to fix.
Download Windows 10 ISO file
If you need to use another file source, it is recommended to use the Media Creation Tool to download a fresh copy of Windows 10.
To download the ISO file of Windows 10, use these steps:
Open this Microsoft support website (opens in new tab) . Click the Download tool now button. Double-click the MediaCreationToolxxxx.exe file to launch the setup. Click the Accept button to agree to the terms. Select the Create installation media (USB flash drive, DVD, or ISO file) for another PC option.
Source: Windows Central (Image credit: Source: Windows Central)
Click the Next button. Click the Next button again.
Source: Windows Central (Image credit: Source: Windows Central)
Select the ISO file option.
Source: Windows Central (Image credit: Source: Windows Central)
Click the Next button. Select the destination to store the Windows 10 ISO file. Click the Save button. Click the link to open the file location with File Explorer.
Source: Windows Central (Image credit: Source: Windows Central)
Click the Finish button. Double-click the Windows.iso file to mount the image. Under the “This PC” section, confirm the drive letter for the mount point.
Source: Windows Central (Image credit: Source: Windows Central)
After you complete the steps, you can continue with the DISM tool using the “Source” option to repair the local image.
Fix Windows 10 recovery image
To run Deployment Image Servicing and Management tool with an alternate source (install.wim) image, use these steps:
Open Start. Search for Command Prompt, right-click the top result, and select the Run as administrator option. Type the following command to repair the Windows 10 image and press Enter: DISM /Online /Cleanup-Image /RestoreHealth /Source:E:\Sources\install.wim In the command, replace “F” with the ISO mount point drive letter in File Explorer.
Source: Windows Central (Image credit: Source: Windows Central)
(Optional) Type the following command to limit the use of Windows Update and press Enter: DISM /Online /Cleanup-Image /RestoreHealth /Source:E\Sources\install.wim /LimitAccess (Optional) Type the following variant of the previous command to accomplish the same task and press Enter: DISM /Online /Cleanup-Image /RestoreHealth /Source:wim:E:\Sources\install.wim:1 /LimitAccess In the command, change E:\Sources , for the path to the “install.wim” file.
Once you complete the steps, the command will scan and repair the problems using the “install.wim” file you specified as the alternative source.
Fix problems with DISM using ESD image
If you have an encrypted “install.esd” image, it’s possible to use it to repair the damaged files on Windows 10.
To use DISM with an “install.esd” image file as the source to repair Windows 10, use these steps:
Open Start. Search for Command Prompt, right-click the top result, and select the Run as administrator option. Type the following command to repair the image with an “install.esd” file and press Enter: DISM /Online /Cleanup-Image /RestoreHealth /Source:C:\ESD\Windows\sources\install.esd In the command, change C:\ESD\Windows\sources with the path to the location of the “.esd” file (if different).
Source: Windows Central (Image credit: Source: Windows Central)
(Optional) Type the following command to limit the use of Windows Update and press Enter: DISM /Online /Cleanup-Image /RestoreHealth /Source:C:\ESD\Windows\sources\install.esd /LimitAccess (Optional) Type the following variant of the previous command to accomplish the same task and press Enter: DISM /Online /Cleanup-Image /RestoreHealth /Source:esd:C:\ESD\Windows\sources\install.esd:1 /LimitAccess (Optional) Type the following command to use an install.esd file located in another drive and press Enter: DISM /Online /Cleanup-Image /RestoreHealth /Source:E:\Sources\install.esd In the command, replace E:\Sources with the path to the location of the “install.esd” file.
After you complete the steps, the tool will repair the damaged files using the files included in the “install.esd” image.
How to run SFC to repair problems on Windows 10
The above instructions will resolve problems with the system image, not the issues with the Windows 10 installation. After restoring the image to a healthy state, use the System File Checker (SFC) command tool to repair the current setup.
To use the SFC command tool to repair Windows 10 problems, use these steps:
Open Start. Search for Command Prompt, right-click the top result, and select the Run as administrator option. Type the following command to repair the installation and press Enter: SFC /scannow Quick tip: If errors are found, you may want to run the command around three times to ensure that everything was fixed correctly.
Source: Windows Central (Image credit: Source: Windows Central)
Once you complete the steps, the System File Checker tool will repair the system files using the local image files, and the log files will be saved on
%windir%/Logs/CBS/CBS.log
and
%windir%\Logs\DISM\dism.log
, which you can view to get more details about the process.
You can use this guide to learn more ways to use the SFC tool to fix problems on Windows 10.
More Windows resources
For more helpful articles, coverage, and answers to common questions about Windows 10 and Windows 11, visit the following resources:
Cách sửa image Windows 10 với DISM
Nếu image Windows bị hỏng, bạn có thể sử dụng công cụ Deployment Imaging and Servicing Management (DISM) để cập nhật file và khắc phục sự cố.
Ví dụ, bạn có thể sử dụng DISM để sửa lỗi Windows Component store (tính năng cốt lõi của Windows lưu trữ tất cả các file hệ thống liên quan đến hệ điều hành được nhóm theo thành phần và dưới dạng liên kết cứng) khi lệnh sfc/scannow không thể sửa các file bị hỏng hoặc bị sửa đổi do Component store bị hỏng.
Công cụ DISM/Cleanup-Image lưu các file nhật ký của nó vào các vị trí file bên dưới.
C:\Windows\Logs\CBS\CBS.log C:\Windows\Logs\DISM\dism.log
Bài viết này sẽ hướng dẫn các bạn cách thực hiện Inbox Corruption Repair với công cụ DISM /Cleanup-Image để sửa lỗi Component store trên Windows 10.
Lưu ý: Bạn phải đăng nhập với tư cách quản trị viên để có thể thực hiện Inbox Corruption Repair với công cụ Deployment Imaging and Servicing Management (DISM).
1. Chạy công cụ DISM /Cleanup-Image từ Command Prompt
Bước 1. Mở Command Prompt với tư cách admin.
Bước 2. Thực hiện Bước 3, Bước 4, Bước 5 (khuyến nghị), Bước 6 hoặc Bước 7 bên dưới cho lệnh DISM bạn muốn sử dụng.
Bước 3. Sử dụng lệnh /CheckHealth
Bạn chỉ sử dụng lệnh /CheckHealth để kiểm tra image được gắn cờ bị hỏng do tiến trình không thành công và có thể sửa chữa được. Đây là một cách nhanh chóng để xem file có bị hỏng hay không. Lệnh này không sửa lỗi hoặc tạo bản ghi. Và thời gian chạy lệnh nhanh chóng.
Trong Command Prompt, sao chép và dán lệnh bên dưới, sau đó nhấn Enter và chuyển đến Bước 8.
Dism /Online /Cleanup-Image /CheckHealth
Bước 4. Sử dụng lệnh /ScanHealth
Sử dụng lệnh /ScanHealth để quét image tìm lỗi Component store. Lệnh này cũng không sửa bất cứ lỗi nào. Nó chỉ kiểm tra lỗi Component store và ghi lỗi vào file nhật ký. Lệnh này có thể mất 5 đến 10 phút để hoàn thành.
Trong Command Prompt, sao chép và dán lệnh bên dưới, sau đó nhấn Enter và chuyển đến Bước 8.
Dism /Online /Cleanup-Image /ScanHealth
Bước 5. Sử dụng lệnh /RestoreHealth
Sử dụng lệnh /RestoreHealth để quét image tìm lỗi Component store, tự động sửa chữa và ghi lỗi vào file nhật ký. Lệnh này có thể mất 10 đến 15 phút hoặc thậm chí vài giờ để hoàn thành tùy thuộc vào mức độ lỗi.
Bạn cần kết nối Internet để chạy lệnh này. Nếu lệnh không thực hiện thành công, bạn có thể thực hiện Bước 6 hoặc Bước 7 bên dưới.
Trong Command Prompt, sao chép và dán lệnh bên dưới, sau đó nhấn Enter và chuyển đến Bước 8.
Dism /Online /Cleanup-Image /RestoreHealth
Bước 6. Sử dụng lệnh /RestoreHealth /Source:wim
Sử dụng lệnh /RestoreHealth /Source:wim để xác định vị trí của file install.wim là nguồn của phiên bản file tốt có thể được sử dụng để sửa lỗi. Quá trình này có thể mất 10 đến 15 phút, thậm chí hàng giờ để hoàn thành phụ thuộc vào mức độ lỗi.
Lệnh này có thể hữu ích nếu Bước 5 trên không thể sửa được image Windows. File install.wim sẽ ở trong thư mục Sources của file ISO Windows 10 được mount. Nếu có file install.esd thay cho file install.wim, thực hiện Bước 7 thay cho bước này.
Xác định file Windows 10 ISO có install.wim trong thư mục sources của file ISO được mount và số chỉ mục cho phiên bản Windows 10 sử dụng lệnh bên dưới trong Command Prompt với tư cách admin:
dism /get-wiminfo /wimfile:
:\sources\install.wim Thay thế Drive Letter với ký tự ổ đĩa thực sự file ISO được mount.
Trong Command Prompt, gõ lệnh bên dưới bạn muốn sử dụng, sau đó nhấn Enter và chuyển đến Bước 8.
Dism /Online /Cleanup-Image /RestoreHealth /Source:wim:Full Path to install.wim file:
Hoặc để ngăn DISM sử dụng Windows Update cho image online:
Dism /Online /Cleanup-Image /RestoreHealth /Source:wim:Full Path to install.wim file:
/limitaccess Lưu ý:
trong lệnh trên là số chỉ mục của phiên bản Windows 10 hệ thống của bạn. Bước 7. Sử dụng lệnh /RestoreHealth /Source:esd
Sử dụng lệnh /RestoreHealth /Source:esd để xác định vị trí của file install.esd làm nguồn của phiên bản file tốt có thể được sử dụng để sửa lỗi. Quá trình này có thể mất hơn chục phút đến vài giờ tùy thuộc vào mức độ lỗi.
Xác định file Windows 10 ISO có install.esd trong thư mục sources của file ISO được mount và số chỉ mục cho phiên bản Windows 10 sử dụng lệnh bên dưới trong Command Prompt với tư cách admin:
dism /get-wiminfo /wimfile:
:\sources\install.esd Thay thế Drive Letter với ký tự ổ đĩa thực sự file ISO được mount.
Trong Command Prompt gõ lệnh sau và nhấn Enter, sau đó chuyển đến Bước 8.
Dism /Online /Cleanup-Image /RestoreHealth /Source:esd:Full Path to install.esd file:
Hoặc để ngăn DISM sử dụng Windows Update cho image online:
Dism /Online /Cleanup-Image /RestoreHealth /Source:esd:Full Path to install.esd file:
/limitaccess
trong lệnh trên là số chỉ mục của phiên bản Windows 10 trên hệ thống của bạn. Bước 8. Nếu thực hiện theo Bước 5, Bước 6 hoặc Bước 7, bạn nên khởi động lại máy tính.
2. Chạy công cụ DISM /Cleanup-Image trong PowerShell
Bước 1. Mở PowerShell với tư cách admin.
Bước 2. Thực hiện Bước 3, Bước 4, Bước 5, Bước 6, hoặc Bước 7 để thực hiện lệnh DISM bạn muốn sử dụng.
Bước 3. Sử dụng lệnh /CheckHealth
Trong PowerShell, nhập lệnh sau, nhấn Enter và chuyển đến Bước 8.
Repair-WindowsImage -Online -CheckHealth
Bước 4. Sử dụng lệnh /ScanHealth
Trong PowerShell, nhập lệnh sau và nhấn Enter, chuyển đến Bước 8.
Repair-WindowsImage -Online -ScanHealth
Bước 5. Sử dụng lệnh /RestoreHealth
Trong PowerShell, nhập lệnh sau và nhấn Enter, chuyển đến Bước 8.
Repair-WindowsImage -Online -RestoreHealth
Bước 6. Sử dụng lệnh /RestoreHealth /Source:wim
Tượng tự như trên, bạn cần xác định file ISO Window 10 có install.esd và tìm index number cho phiên bản Windows 10.
Dán lệnh sau vào PowerShell:
Repair-WindowsImage -Online -RestoreHealth -Source “Full Path to install.wim file:
” Hoặc để ngăn DISM sử dụng Windows Update cho image online.
Repair-WindowsImage -Online -RestoreHealth -Source “Full Path to install.wim file:
” -LimitAccess Thay
trong lệnh trên với số index number thật. Bước 7. Sử dụng lệnh /RestoreHealth /Source:esd
Dán lệnh sau vào PowerShell và nhấn Enter.
Repair-WindowsImage -Online -RestoreHealth -Source “Full Path to install.esd file:
” Hoặc để ngăn DISM sử dụng Windows Update cho image online.
Repair-WindowsImage -Online -RestoreHealth -Source “Full Path to install.esd file:
” -LimitAccess Bước 8. Khởi động lại máy tính sau khi thực hiện các Bước 5, 6, và Bước 7.
Chúc các bạn thực hiện thành công!
How to use the Deployment Image Servicing and Management Tool (DISM) to repair the Windows System Store
The Deployment Image Servicing and Management (DISM) tool can be used to scan and repair potential issues with the .wim store in Windows that may impact system files. This article provides information on the DISM tool and how to use it to scan and repair the .wim store.
Information on the Deployment Image Servicing and Management Tool (DISM)
The Deployment Image Servicing and Management Tool (DISM) is an administrator-level, command-line executable available in Windows which can be used to repair your Windows image or to modify Windows installation media. It is able to mount Windows images in .wim, .vhd, or .vhdx format, and can be used to address issues in the currently installed Windows operating system.
Using the Deployment Image Servicing and Management Tool (DISM) to repair the Windows System Store
The System File Checker tool can be used to repair corrupted system files. For more information on how to use the tool, refer to the following Microsoft article: Use the System File Checker tool to repair missing or corrupted system files . The System File Checker tool compares those files against the .wim store that is saved on the system (not to be confused with the Windows Software Store app where you can purchase software for Windows). If this store is corrupted, the repairs may not resolve the problems that the system is having. The DISM tool has some modifiers that can scan and repair the .wim store based on parent copies stored on Microsoft’s update servers, making it useful to run in conjunction with a system file check. Reference the table below for a list and description of DISM tool modifiers (Table 1):
Modifier Description /online Signifies that you are modifying an online image (does not signify that a scan will run over the internet) /cleanup-image Triggers a more extensive check which can resolve issues with the store /checkhealth Starts a basic check to see if corruption has been detected in the store /scanhealth Performs a more comprehensive scan of the store for corruption /restorehealth Scans the store for corruption and also repairs corrupted files
DISM modifier and description
As an example, the following command would trigger a scan of an online image to check the Windows store for corruption and repair any that it finds:
dism /online /cleanup-image /restorehealth
The command does not always check the files with the parent copies stored on the Windows Update servers by default, and adding the /online modifier does not allow the computer to pull from the Windows Update server with it disabled. If the online functionality is disabled, you may run the command and get an error stating that it was unable to find the source file. Note that with this option enabled, the repair will likely take significantly longer depending on your internet connection speed. To enable the option:
Open the Local Group Policy Editor by typing gpedit.msc into the start menu search bar and pressing Enter. Navigate to Computer Configuration>Administrative Templates>System>Specify settings for optional component installation and component repair then double click on it to open up the settings window. Set the process to enabled, and in the Option section look for the option labeled Contact Windows Update directly to download repair content instead of Windows Server Update Services (WSUS) and check the box.
Under good conditions, the command will take about 10-20 minutes to run, but depending on circumstances it can potentially take over an hour.
Additional Reference:
DISM.exe /Online /Cleanup-Image /Restorehealth Explained
In this Itechguide, Victor explains “DISM.exe /Online /Cleanup-Image /Restorehealth” – what it is and how to use it. The Itechguide also includes some examples.
“DISM.exe /Online /Cleanup-Image /Restorehealth” is a DISM command that repairs issues with the running Operating system you are logged into.
Before I go further to explain what “DISM.exe /Online /Cleanup-Image /Restorehealth” does let me define DISM.exe first.
What is DISM.EXE?
DISM.exe (Deployment Image Servicing and Management) is a Windows command-line tool that is used to manage both Windows Online and Offline Images.
DISM.exe /Online /Cleanup-Image /Restorehealth Explained
As I said in my introduction, this command fixes any problem(s) identified in your current operating system.
But what does each switch in this command do? I will explain the switches and put it all together for you.
DISM.exe /Online vs /Image
When you run DISM.exe command, you must either specify the /Online or /Image switch. If you specify the /Online switch, DISM.exe will not expect a path to an offline image. Rather, the command tool will target the running operating system.
On the other hand, if you specify the /Image switch, Deployment Image Servicing and Management tool will expect you to specify the path to the root directory of an offline Windows image.
DISM.exe supports Windows image (.wim) file or virtual hard disk (.vhd or .vhdx) as offline images.
So, DISM.exe /Online switch means you are asking DISM to target the running Operating system instead of an offline image. In the next section, I will explain the /Cleanup-Image switch.
DISM.exe /Cleanup-Image
For DISM.exe command to work, the /Online or /Image switch must be followed by other image servicing commands. One of the command-line options for the DISM.exe /Online switch is the /Cleanup-Image switch.
So, what does the /Cleanup-Image switch do in our “DISM.exe /Online /Cleanup-Image /Restorehealth” command? The /Cleanup-Image switch performs cleanup and recovery operations on the running Operating System.
To put it together to this point: when you run the command “DISM.exe /Online /Cleanup-Image”, you are asking Deployment Image Servicing and Management tool to:
Target the running Operating System Perform cleanup and recovery operations on the running Operating System
DISM.exe /Restorehealth
The last switch in “DISM.exe /Online /Cleanup-Image /Restorehealth” command is the /Restorehealth switch. The /RestoreHealth switch scans the Operating System for corrupt files. If DISM finds corrupt files, it attempts to repair them automatically.
Tip
When you run the command ” DISM.exe /Online /Cleanup-Image /Restorehealth”, it may appear to be stuck. Do not panic. Give it sometime. It will usually complete.
What Does “DISM.exe /Online /Cleanup-Image /Restorehealth” Do?
With the 3 switches in the command explained, I can summarize what the command does.
When you run DISM.exe /Online /Cleanup-Image /Restorehealth command, it does the following:
The /Online switch instructs DISM.exe to target the running Operating System instead of an offline Windows image (.wim) file or virtual hard disk (.vhd or .vhdx) The /Cleanup-Image switch performs cleanup and recovery operations on the running Operating System Finally, the /Restorehealth switch scans the running Operating System for corrupt files and attempts to fix them.
Below is the result of the command.
How to Use DISM.EXE to Check Your Operating System Health
I suppose by now, you are probably thing “can DISM.exe help me find problems in my OS?” Yes, it can! If you are having problems with your Windows computer, use the /ScanHealth switch to perform advanced scan. See the command below:
DISM /Online /Cleanup-Image /ScanHealth
The result of the command is shown in the image below:
How To Run DISM.EXE from Windows 10 Recovery Mode
Sometimes Windows may not even boot. If you wish to repair your Windows 10 computer that does not boot at all, use the steps below:
Download Windows 10 ISO, burn it into a DVD and boot your computer with it. For a step by step guide on how to download Window 10 ISO image, read Download Windows 10 ISO Image.
When your computer boots to the screen shown below, press any key to boot into the Windows 10 DVD.
On the Windows Setup screen, click Next. Then click Repair your computer.
Next, click Troubleshoot. Then click Command Prompt.
Command Prompt loads.
To repair Windows 10 from the ISO, we require Install.WIM. Unfortunately, Install.WIM is not readily available in Windows 10 ISO. It has to be extracted.
How To Extract Install.WIM from Windows 10 ISO
As I said earlier, before you can use DISM /Online /Cleanup-Image /RestoreHealth command with a WIM file, the file has to be extracted.
Follow the steps below to extract the OS WIM file from install.esd:
First, you need to determine the drive your ISO image was mounted. This will depend on the number of drives on your computer. Knowing that it cannot be drive C, try D, then E and so on.
To change to a drive, enter the drive name, followed by colon then press Enter.
D:
Next, type Dir and press the Enter key.
DIR
Keep checking possible drive letters until you find the one with folders, boot, efi, sources and support. This is the drive your Windows 10 ISO is mounted.
Next, you need to find the index number of the Windows 10 edition you wish to use. To do this, execute the command below:
cd sources
Then, type this command and press the enter key.
dism /Get-WimInfo /WimFile:install.esd
The result of the last command is shown below:
All the Windows 10 editions are listed with their index number. As the edition installed on my computer is Windows 10 Pro, I need to use the same edition for DISM repair. To see the index number, I need to scroll down a bit. Here are the details of Windows 10 Pro.
The index number I need is 6.
Before you proceed, you need to create a folder to extract your Install.WIM file to. To do this type the command below and press Enter.
mkdir d:\test
Tip
I created the folder in drive D because I know it exists. Replace drive D with a drive that exists on your computer.
Now it is time to extract Install.WIM to d:\test folder. To do this, run the command below:
dism /export-image /SourceImageFile:install.esd /SourceIndex:6 /DestinationImageFile:d:\test\install.wim /Compress:max /CheckIntegrity
Tip
This command must be run from the /Sources folder of the ISO mount drive. Note that it will take a while for the command to complete.
When the command completes, proceed to the next step.
Finally, to repair windows 10 using intall.wim, run the command below:
DISM /Online /Cleanup-Image /RestoreHealth /Source:d:\test\install.wim
When I ran the command it returned error 50: DISM does not support servicing Windows PE with the /Online option. If you receive this error message, find the resolution below this image.
How to Fix DISM Error 50
If you receive error 50 – “dism does not support servicing windows PE with the /online option”, resolve it with the steps below:
From the command prompt, type regedit and press enter. Registry editor opens.
Navigate to HKEY_LOCAL_MACHINE\SYSTEM\ControlSet001\Control. Right-click MiniNT key and delete it. On the delete confirmation, click Yes.
On the command prompt, type Exit and press Enter. Then Select Turn Off your PC.
When the Computer reboots, repeat the steps from Run DISM.EXE from Windows 10 Recovery Mode (opens in a new window/tab)
Tip
When you reboot your computer and load command prompt, you do not need to Extract Install.WIM from Windows 10 ISO again.
When Command Prompt loads, change to the drive letter where your ISO is mounted. Also change to the \Sources directory. Then rerun the DISM command shown below:
DISM /Online /Cleanup-Image /RestoreHealth /Source:d:\test\install.wim
If error 50 persists, get more information on how to resolve it from this guide – How to quickly fix DISM error 50 on Windows 10 (opens in a new window/tab). You may also read the DISM log shown in the error message.
How to Fix DISM.exe /Online /Cleanup-Image /Restorehealth Error 87
There are so many reasons why you may receive error 87 when you run the “DISM.exe /Online /Cleanup-Image /Restorehealth” command. Here are some of the causes of the error and how to fix them.
DISM.exe /Online /Cleanup-Image /Restorehealth Error 87: Solution 1
From my research, the top on the list is when you run the command without adding the required spaces in the switches. Below is the DISM command without spaces:
Solution
Run the command with spaces as shown below:
DISM.exe /Online /Cleanup-Image /Restorehealth
DISM.exe /Online /Cleanup-Image /Restorehealth Error 87: Solution 2
Another reason for error 87 could be pending updates.
Solution
The solution is to install all and any pending updates.
To check for and install any pending update, follow the steps below:
Right-click Windows logo on the left of your task bar [1]. Then click System [2].
When Settings loads, type updates in the search bar [1]. Then select Check for updates. Check the part labelled [3] for pending updates. If any click install.
DISM.exe /Online /Cleanup-Image /Restorehealth: Frequently Asked Question
This section answers frequently asked DISM.exe questions
1. What is DISM.exe? DISM.exe (Deployment Image Servicing and Management) is a Windows command-line tool used to manage Windows images. The tool can be used to manage running operating systems or Operating System images and VHDs. 2. What Is DISM.exe /Online /Cleanup-image /RestoreHealth? This DISM command repairs the windows operating system it runs on. The /Online switch forces DISM to scan the operating system for errors – it fixes any errors. 3. Is DISM Safe To Run? DISM.exe is a legitimate Windows command that manages both online and offline Windows images. It is completely safe to run DISM.exe 4. How Long Does It Take for DISM /Online /Cleanup-image /RestoreHealth To Run? It take between 10 minutes to a few hours for DISM /Online /Cleanup-image /RestoreHealth to run. How long it takes depends on how much errors it finds and needs to fix 5. Should I run DISM or SFC First? It is recommended to run SFC first. Then, run DISM /Online /Cleanup-image /RestoreHealth. SFC checks for Windows file integrity violations and tries to fix them. However, DISM is more effective at fixing corrupt Windows Operating System files.
“DISM.exe /Online /Cleanup-Image /Restorehealth” is a very important and helpful Window command!
I hope you found this guide helpful? If you found this article helpful, kindly spare 2 minutes to share your experience with our community at Itechguides Community Forum.
However, if you have any questions regarding this article or if the steps did not fix your problem, please post your question at Itechguides Community Forum. Our team and other community members will come back to you with a fix as soon as possible.
Finally, for more Itechguides like this, visit our Windows OS Explained page.
DISM.exe /Online /Cleanup-Image /Restorehealth commands. What can it do?
DISM.exe /Online /Cleanup-Image /Restorehealth” is a Dism command that runs a scan for corruption and repairs problems that it finds with the operating system you are logged into.
Ahead, we will explain how DISM.exe/Online/Cleanup-Image/ Restorehealth” works. But first, let’s have a look into what DISM is:
DISM
The deployment image servicing and management tool (DISM) is manipulated to scan and restore potential issues within the windows that may impact an operating system.
Dism.exe switches
Dism.exe will always target your chosen area; you must either specify the /online or /Image switch. Dism.exe will not foresee a path to an offline image.
Image switch and online switch
On the other hand, if you consider /image switch, DISM will expect you to restrict the path to the root directory of an offline Windows image. However, the DISM.exe /Online switch means you ask DISM to target the operating system instead of an offline image.
What is a /Cleanup-image switch? How does it work? In this section, we will explain it to you:
For this deployment Image Servicing and Management tool to work, you need to follow other image servicing tools and commands with /online or /Image switch. One of the few is the cleanup-image switch.
Cleanup-image switch
This switch functions to clean and recover operations and undertakings on the running operating network in Dism.exe/online/Cleanup-image/ Restorehealth” command. Which means when you run dism.exe/Online/Cleanup-image, you are asking the Dism tool to:
Cleanup and repair operations on the system. Target running operating system.
The next and last switch is the “DISM.exe /Online /Cleanup-Image /Restorehealth” command is the /Restorehealth switch.”
/Restorehealth switch
It attempts to repair the corrupted scanned files automatically from the operating network.
DISM.exe /Online /Cleanup-Image /Restorehealth” command does the following:
1) The online switch requires DISM.exe to target the running operating system rather than offline windows image(.wim) or virtual hard disk.
2) The cleanup-image switch has to go for cleaning and recovery operation on a system.
3) The last one, /Restorehealth Switch, scans the ongoing operating system for corrupt files and attempts to restore them.
Check your operating system health
Can Dism.exe help you find problems in the OS? It for sure, can. Have you got some issues with your Windows computer? Use the /scan health switch to execute a progressive scan.
Here’s a command to it:
DISM /Online /Cleanup-Image /ScanHealth
You Want To Run Dism.Exe From Windows Recovery Mode?
You want to repair your windows10 computer that doesn’t boot at all, use the following steps:
Download Windows 10 ISO, burn it in your DVD, and boot your system. When you see your computer boots displays on the screen, press any key to boot into the Windows 10 DVD. Click next on the window setup screen. Then click repair your computer. Click troubleshoot next. Then hit the command prompt button. Command prompt loads.
We need to extract the file before using the DISM /Online /Cleanup-Image /RestoreHealth command with a WIM file.
Follow the steps below to extract the OS WIM file from install.esd:
You need to determine the drive your ISO image was mounted first. However, this depends on the number of drives on your computer. Acknowledging that it can’t drive C, try D and then E, and so on. Enter the drive name, followed by a colon to alter the drive name. Then, press enter.
D
Proceed, type Dir and press the enter key.
DIR
Observe possible drive letters until you find the one with folders, boot, EFI, sources, and support. This is the drive your windows 10 Iso has made file directories of on a storage device.
Next, you have to find out the index number of the Windows10 edition you would prefer to use.
To do this, you need to follow the below command:
CD sources
Type this command and hit the enter key.
dism /Get-WimInfo /WimFile:install.esd
You will see an outcome to the command written above.
In short, DISM.exe /Online /Cleanup-Image /Restorehealth” is an extremely significant and helpful windows command.
Repair a Windows Image
Table of contents
Repair a Windows Image
Article
12/15/2021
2 minutes to read
5 contributors
In this article
Repair a Windows image using DISM. You can repair offline Windows image in a WIM or VHD file, or an online Windows image. An online Windows image will also attempt to repair itself if it becomes unserviceable. The repair source for this operation is the same source that is used for Features on Demand and is determined by Group Policy settings. For more information, see Configure a Windows Repair Source. When you use the DISM tool to repair an online or offline image, you can use the /Source argument with the /RestoreHealth argument to specify additional repair source locations to use to search for the required files.
For a quick check of an online image, you may be able to use the command: sfc /scannow to scan and repair files.
For a more extensive check that can repair issues with the store, use DISM /Cleanup-Image .
To check if an image is repairable
Scan the image to check for corruption. This operation will take several minutes. For example, at a command prompt, type the following command: Dism /Online /Cleanup-Image /ScanHealth Check the image to see whether any corruption has been detected. For example, at a command prompt, type: Dism /Online /Cleanup-Image /CheckHealth
When you use the /CheckHealth sfc argument, the DISM tool will report whether the image is healthy, repairable, or non-repairable. If the image is non-repairable, you should discard the image and start again. If the image is repairable, you can use the /RestoreHealth argument to repair the image.
To repair an image
Use the /RestoreHealth argument to repair the image. For example, to repair an offline image using a mounted image as a repair source, at a command prompt, type the following command: Dism /Image:C:\offline /Cleanup-Image /RestoreHealth /Source:c:\test\mount\windows Or to repair an online image using some of your own sources instead of Windows Update, type: Dism /Online /Cleanup-Image /RestoreHealth /Source:c:\test\mount\windows /LimitAccess If you do not specify a /Source for the repair files, the default location for Features on Demand is used. For more information, see Configure a Windows Repair Source. If you specify more than one /Source, the files are copied from the first location where they are found and the rest of the locations are ignored. You can use /LimitAccess to prevent the DISM tool from using Windows Update as a repair source or as a backup repair source for online images.
Repairing images during servicing
In some cases, an image can be corrupted while modifying it with DISM. Use /Cleanup-MountPoints to repair it. This command will not unmount images that are already mounted, nor will it delete images that can be recovered using the /Remount-Image command.
Dism /Cleanup-Mountpoints
Related topics
Use the System File Checker tool to repair missing or corrupted system files
DISM Operating System Package Servicing Command-Line Options
Configure a Windows Repair Source
Sử dụng công cụ DISM để sửa Windows bị lỗi
5/5 – (2 bình chọn)
Bạn đang gặp vấn đề với Windows 10? Trong hướng dẫn, Hotromicrosoft.com giúp bạn cách để sửa lỗi Windows bằng Trình kiểm tra tệp hệ thống-System File Checker (SFC).
Kiểm tra và sửa lỗi Windows 10 bằng DISM
Trên Windows 10, Deployment Image Servicing and Management (DISM) là công cụ được thiết kế để nhà quản trị mạng chuẩn bị, sửa đổi và sửa chữa hệ thống, bao gồm Windows Recovery Environment, Windows Setup, and Windows PE (WinPE). Tuy nhiên, ai cũng có thể sử dụng công cụ này để khắc phục các lỗi phổ biến với hình ảnh khôi phục ẩn trên máy tính.
Thông thường, khi máy tính gặp sự cố về hiệu suất, không khởi động chính xác hoặc bạn đang khắc phục lỗi, bạn sử dụng Trình kiểm tra tệp hệ thống-System File Checker (SFC) để quét, phát hiện và thay thế các tệp hệ thống bị hỏng hoặc bị thiếu bằng cách sử dụng recovery image có sẵn trên máy.
Tuy nhiên, nếu các tệp thay thế bên trong Windows 10 image bị hỏng, công cụ SFC sẽ không hoạt động. Trong tình huống cụ thể này, bạn sử dụng công cụ DISM để quét và sửa chữa hình ảnh “install.wim”, sau đó bạn có thể sử dụng với SFC để sửa chữa cài đặt của mình.
Trong hướng dẫn Windows 10, tôi sẽ hướng dẫn các bước để sử dụng các công cụ DISM và SFC với Command Prompt để khôi phục máy tính bị lỗi của bạn.
Chạy DISM để sửa Windows 10 image
Chạy SFC để sửa các lỗi của Windows 10.
Cảnh báo: Mặc dù các lệnh không làm hỏng Windows nhưng có can thiệp vào hệ thống. Vì vậy bạn nên tạo một bản sao lưu đầy đủ. Hướng dẫn tạo sao lưu tại đây.
Chạy DISM để sửa Windows image
Công cụ DISM có ba tùy chọn chính để sửa chữa Windows 10 Image, bao gồm “CheckHealth“, “ScanHealth” và “RestoreHealth“. Ta có thể chạy lệnh theo trình tự này. Ngoài ra, tùy thuộc độ phức tạp của lỗi, có các cài đặt bổ sung với tùy chọn “RestoreHealth” để sửa Image bằng các nguồn khác nhau.
Kiểm tra lỗi với DISM bằng tùy chọn CheckHealth
Bạn sử dụng tùy chọn “CheckHealth” với DISM để nhanh chóng xác định xem có lỗi nào với hình ảnh cục bộ (local image) hay không. Tùy chọn này sẽ không thực hiện bất kỳ sửa chữa nào.
Để kiểm tra các sự cố trong Image với DISM, hãy sử dụng các bước sau:
Mở Start.
Tìm kiếm Command Prompt , bấm chuột phải vào kết quả trên cùng và chọn tùy chọn Run as administrator .
, bấm chuột phải vào kết quả trên cùng và chọn tùy chọn . Nhập lệnh sau để thực hiện kiểm tra sức khỏe nhanh và nhấn Enter:
DISM /Online /Cleanup-Image /CheckHealth
Kiểm tra lỗi trên Windows 10
Khi bạn hoàn thành các bước, lệnh chạy và xác minh nếu có bất kỳ lỗi nào cần khắc phục.
Kiểm tra lỗi với DISM bằng tùy chọn ScanHealth
Chạy DISM với tùy chọn “ScanHealth” thay vì “CheckHealth” để thực hiện quét nâng cao hơn để xác định xem Windows 10 Image có vấn đề gì không.
Để thực hiện quét nâng cao với DISM, hãy sử dụng các bước sau:
Mở Start.
Tìm kiếm Command Prompt , bấm chuột phải vào kết quả trên cùng và chọn tùy chọn Run as administrator .
, bấm chuột phải vào kết quả trên cùng và chọn tùy chọn . Gõ lệnh dưới đây để quét DISM nâng cao và nhấn Enter:
DISM /Online /Cleanup-Image /CheckHealth
Kiểm tra sức khỏe WIndows 10 của bạn
Sau khi bạn hoàn thành các bước, quá trình quét nâng cao sẽ mất vài phút để xác định xem hình ảnh cục bộ có cần sửa chữa hay không.
Sửa chữa lỗi với DISM bằng tùy chọn Restoreealth
Nếu có vấn đề, thì bạn có thể sử dụng DISM với tùy chọn “Restoreealth”. Lệnh sẽ chạy quét nâng cao và tự động sửa chữa mọi vấn đề.
Để sửa chữa các sự cố hình ảnh Windows 10 với DISM, hãy sử dụng các bước sau:
Mở Start.
Tìm kiếm Command Prompt , bấm chuột phải vào kết quả trên cùng và chọn tùy chọn Run as administrator .
, bấm chuột phải vào kết quả trên cùng và chọn tùy chọn . Gõ lệnh dưới đây để sửa Windows 10 image và nhấn Enter:
DISM /Online /Cleanup-Image /RestoreHealth
Sửa lỗi Windows 10 với nguồn Windows 10 chuẩn
Lưu ý: Khi lệnh đang chạy, sẽ mất thời gian lâu hơn ở mức 20% hoặc 40%. Sau vài phút, quá trình sẽ hoàn thành thành công.
Khi bạn hoàn thành các bước, công cụ DISM sẽ kết nối với máy chủ Windows Update để tải xuống và thay thế mọi tệp bị hỏng trong hình ảnh cục bộ cho Windows 10 cần thiết.
Sửa lỗi với DISM sử dụng WIM image
DISM không có khả năng gặp sự cố. Nhưng trong trường hợp hiếm gặp là Windows Update gây ra sự cố thay thế tệp hoặc bạn không có kết nối internet. Để sửa lỗi, bạn cần sử dụng tới Windows Image khác với tùy chọn Source.
Trước khi bạn có thể chỉ định một nguồn khác. Bạn sẽ cần tệp install.wim hoặc install.esd từ một máy tính khác, USB Boot hoặc tệp ISO. Ngoài ra, điều quan trọng là source của Windows Image phải cùng phiên bản, phiên bản và ngôn ngữ với Windows 10 mà bạn đang sử dụng trên máy tính.
Download Windows 10 ISO
Để tải Windows 10 ISO chuẩn từ Microsoft, bạn có thể sử dụng công cụ Media Creation Tool chính hãng từ Microsoft. Bạn tải Media Creation Tool và ISO Windows 10 tại đây.
Tôi đã có bài viết hướng dẫn tải Windows 10 ISO chuẩn từ Microsoft tại đây.
Sau khỉ tải về Windows 10 ISO file thành công. Bấm đúp vào tệp Windows.iso để tạo đĩa ảo với Windows Image đã tải về. Trong phần This PC, trong khung bên trái, xác nhận ký tự ổ đĩa cho hình ảnh được gắn.
Sau khi hoàn thành các bước, bạn có thể sử dụng DISM với tùy chọn “Source” để sửa chữa local Image của Windows 10.
Sửa lỗi Windows 10 recovery image
Để chạy DISM cụ thể với source khác (install.wim) image, theo các bước sau:
Mở Start. Tìm kiếm Command Prompt, bấm chuột phải vào kết quả trên cùng và chọn tùy chọn Run as administrator. Gõ lệnh dưới đây để sửa Windows 10 image và nhấn Enter:
DISM /Online /Cleanup-Image /RestoreHealth /Source:D:\Sources\install.wim
Trong câu lênh, phải đảm bảo thay ký tự “D” tương ứng với đúng tên Ổ đĩa ảo bạn đã mount ISO Windows 10 tải về.
(Tùy chọn) Gõ lệnh dưới để hạn chế sử dụng Windows Update, rồi nhấn Enter:
DISM /Online /Cleanup-Image /RestoreHealth /Source:D\Sources\install.wim /LimitAccess
Khi bạn hoàn thành các bước, lệnh sẽ quét và sửa chữa mọi vấn đề bằng cách sử dụng hình ảnh install.wim mà bạn đã chỉ định.
Sửa chữa lỗi với DISM bằng ESD image
Ngoài ra, nếu bạn có install.esd image được mã hóa từ bản upgrade gần đây, bạn có thể sử dụng nó để sửa chữa các tệp bị hỏng.
Để chạy DISM chỉ định hình ảnh nguồn (install.esd) khác, hãy sử dụng các bước sau:
Mở Start. Tìm kiếm Command Prompt, bấm chuột phải vào kết quả trên cùng và chọn tùy chọn Run as administrator. Gõ lệnh dưới để sửa lỗi image với nguồn bên ngoài và nhấn Enter:
DISM /Online /Cleanup-Image /RestoreHealth /Source:C:\$Windows.~BT\Sources\install.esd
Trong câu lênh, đảm bảo đường dẫn chính xác “C:\$Windows.~BT\Sources,” của file install.esd nếu có.
(Tùy chọn) Gõ lệnh dưới đây để hạn chế sử dụng Windows Update và nhấn Enter:
DISM /Online /Cleanup-Image /RestoreHealth /Source:C:\$Windows.~BT\Sources\install.esd /LimitAccess
Sau khi bạn thực hiện các bước trên, Deployment Image Servicing and Management sẽ chạy để sửa lỗi tập tin bằng tập tin trong install.esd image. Quá trình hoàn thành, log files được lưu tại: %windir%/Logs/CBS/CBS.log và %windir%\Logs\DISM\dism.log sẽ ghi nhận lại bất kỳ lỗi nào và đã sửa chúng.
Chạy SFC để sửa lỗi trênWindows 10
Các hướng dẫn ở trên sử dụng DISM sẽ khắc phục mọi sự cố với hình ảnh ẩn cục bộ. Nhưng không khắc phục các sự cố với cài đặt thực tế của Windows 10. Tuy nhiên, bây giờ khi bạn có một Image chuẩn, sạch, bạn có thể sử dụng nó với System File Checker để sửa chữa các sự cố phổ biến trên máy.
Để sử dụng công cụ lệnh SFC để sửa chữa cài đặt Windows 10, hãy sử dụng các bước sau:
Mở Start. Tìm kiếm Command Prompt, bấm chuột phải vào kết quả trên cùng và chọn tùy chọn Run as administrator. Gõ lệnh dưới để sửa lỗi image với nguồn bên ngoài và nhấn Enter:
SFC /scannow
Sửa lỗi Windows 10 bằng SFC lệnh
Mẹo nhanh: Nếu tìm thấy lỗi, bạn có thể chạy lệnh khoảng ba lần để đảm bảo rằng mọi thứ đều được sửa một cách chính xác.
Khi hoàn thành các bước, System File Checker quét máy tính của bạn và sửa chữa mọi tệp hệ thống bằng cách sử dụng các file chuẩn từ local Image để khôi phục Windows 10.
Lệnh trên đủ để sửa lỗi cài đặt, còn có rất nhiều lệnh SFC mà bạn có thể sử dụng để sửa chữa Windows 10.
DISM.exe /Online /Cleanup-Image /Restorehealth Explained
In this Itechguide, Victor explains “DISM.exe /Online /Cleanup-Image /Restorehealth” – what it is and how to use it. The Itechguide also includes some examples.
“DISM.exe /Online /Cleanup-Image /Restorehealth” is a DISM command that repairs issues with the running Operating system you are logged into.
Before I go further to explain what “DISM.exe /Online /Cleanup-Image /Restorehealth” does let me define DISM.exe first.
What is DISM.EXE?
DISM.exe (Deployment Image Servicing and Management) is a Windows command-line tool that is used to manage both Windows Online and Offline Images.
DISM.exe /Online /Cleanup-Image /Restorehealth Explained
As I said in my introduction, this command fixes any problem(s) identified in your current operating system.
But what does each switch in this command do? I will explain the switches and put it all together for you.
DISM.exe /Online vs /Image
When you run DISM.exe command, you must either specify the /Online or /Image switch. If you specify the /Online switch, DISM.exe will not expect a path to an offline image. Rather, the command tool will target the running operating system.
On the other hand, if you specify the /Image switch, Deployment Image Servicing and Management tool will expect you to specify the path to the root directory of an offline Windows image.
DISM.exe supports Windows image (.wim) file or virtual hard disk (.vhd or .vhdx) as offline images.
So, DISM.exe /Online switch means you are asking DISM to target the running Operating system instead of an offline image. In the next section, I will explain the /Cleanup-Image switch.
DISM.exe /Cleanup-Image
For DISM.exe command to work, the /Online or /Image switch must be followed by other image servicing commands. One of the command-line options for the DISM.exe /Online switch is the /Cleanup-Image switch.
So, what does the /Cleanup-Image switch do in our “DISM.exe /Online /Cleanup-Image /Restorehealth” command? The /Cleanup-Image switch performs cleanup and recovery operations on the running Operating System.
To put it together to this point: when you run the command “DISM.exe /Online /Cleanup-Image”, you are asking Deployment Image Servicing and Management tool to:
Target the running Operating System Perform cleanup and recovery operations on the running Operating System
DISM.exe /Restorehealth
The last switch in “DISM.exe /Online /Cleanup-Image /Restorehealth” command is the /Restorehealth switch. The /RestoreHealth switch scans the Operating System for corrupt files. If DISM finds corrupt files, it attempts to repair them automatically.
Tip
When you run the command ” DISM.exe /Online /Cleanup-Image /Restorehealth”, it may appear to be stuck. Do not panic. Give it sometime. It will usually complete.
What Does “DISM.exe /Online /Cleanup-Image /Restorehealth” Do?
With the 3 switches in the command explained, I can summarize what the command does.
When you run DISM.exe /Online /Cleanup-Image /Restorehealth command, it does the following:
The /Online switch instructs DISM.exe to target the running Operating System instead of an offline Windows image (.wim) file or virtual hard disk (.vhd or .vhdx) The /Cleanup-Image switch performs cleanup and recovery operations on the running Operating System Finally, the /Restorehealth switch scans the running Operating System for corrupt files and attempts to fix them.
Below is the result of the command.
How to Use DISM.EXE to Check Your Operating System Health
I suppose by now, you are probably thing “can DISM.exe help me find problems in my OS?” Yes, it can! If you are having problems with your Windows computer, use the /ScanHealth switch to perform advanced scan. See the command below:
DISM /Online /Cleanup-Image /ScanHealth
The result of the command is shown in the image below:
How To Run DISM.EXE from Windows 10 Recovery Mode
Sometimes Windows may not even boot. If you wish to repair your Windows 10 computer that does not boot at all, use the steps below:
Download Windows 10 ISO, burn it into a DVD and boot your computer with it. For a step by step guide on how to download Window 10 ISO image, read Download Windows 10 ISO Image.
When your computer boots to the screen shown below, press any key to boot into the Windows 10 DVD.
On the Windows Setup screen, click Next. Then click Repair your computer.
Next, click Troubleshoot. Then click Command Prompt.
Command Prompt loads.
To repair Windows 10 from the ISO, we require Install.WIM. Unfortunately, Install.WIM is not readily available in Windows 10 ISO. It has to be extracted.
How To Extract Install.WIM from Windows 10 ISO
As I said earlier, before you can use DISM /Online /Cleanup-Image /RestoreHealth command with a WIM file, the file has to be extracted.
Follow the steps below to extract the OS WIM file from install.esd:
First, you need to determine the drive your ISO image was mounted. This will depend on the number of drives on your computer. Knowing that it cannot be drive C, try D, then E and so on.
To change to a drive, enter the drive name, followed by colon then press Enter.
D:
Next, type Dir and press the Enter key.
DIR
Keep checking possible drive letters until you find the one with folders, boot, efi, sources and support. This is the drive your Windows 10 ISO is mounted.
Next, you need to find the index number of the Windows 10 edition you wish to use. To do this, execute the command below:
cd sources
Then, type this command and press the enter key.
dism /Get-WimInfo /WimFile:install.esd
The result of the last command is shown below:
All the Windows 10 editions are listed with their index number. As the edition installed on my computer is Windows 10 Pro, I need to use the same edition for DISM repair. To see the index number, I need to scroll down a bit. Here are the details of Windows 10 Pro.
The index number I need is 6.
Before you proceed, you need to create a folder to extract your Install.WIM file to. To do this type the command below and press Enter.
mkdir d:\test
Tip
I created the folder in drive D because I know it exists. Replace drive D with a drive that exists on your computer.
Now it is time to extract Install.WIM to d:\test folder. To do this, run the command below:
dism /export-image /SourceImageFile:install.esd /SourceIndex:6 /DestinationImageFile:d:\test\install.wim /Compress:max /CheckIntegrity
Tip
This command must be run from the /Sources folder of the ISO mount drive. Note that it will take a while for the command to complete.
When the command completes, proceed to the next step.
Finally, to repair windows 10 using intall.wim, run the command below:
DISM /Online /Cleanup-Image /RestoreHealth /Source:d:\test\install.wim
When I ran the command it returned error 50: DISM does not support servicing Windows PE with the /Online option. If you receive this error message, find the resolution below this image.
How to Fix DISM Error 50
If you receive error 50 – “dism does not support servicing windows PE with the /online option”, resolve it with the steps below:
From the command prompt, type regedit and press enter. Registry editor opens.
Navigate to HKEY_LOCAL_MACHINE\SYSTEM\ControlSet001\Control. Right-click MiniNT key and delete it. On the delete confirmation, click Yes.
On the command prompt, type Exit and press Enter. Then Select Turn Off your PC.
When the Computer reboots, repeat the steps from Run DISM.EXE from Windows 10 Recovery Mode (opens in a new window/tab)
Tip
When you reboot your computer and load command prompt, you do not need to Extract Install.WIM from Windows 10 ISO again.
When Command Prompt loads, change to the drive letter where your ISO is mounted. Also change to the \Sources directory. Then rerun the DISM command shown below:
DISM /Online /Cleanup-Image /RestoreHealth /Source:d:\test\install.wim
If error 50 persists, get more information on how to resolve it from this guide – How to quickly fix DISM error 50 on Windows 10 (opens in a new window/tab). You may also read the DISM log shown in the error message.
How to Fix DISM.exe /Online /Cleanup-Image /Restorehealth Error 87
There are so many reasons why you may receive error 87 when you run the “DISM.exe /Online /Cleanup-Image /Restorehealth” command. Here are some of the causes of the error and how to fix them.
DISM.exe /Online /Cleanup-Image /Restorehealth Error 87: Solution 1
From my research, the top on the list is when you run the command without adding the required spaces in the switches. Below is the DISM command without spaces:
Solution
Run the command with spaces as shown below:
DISM.exe /Online /Cleanup-Image /Restorehealth
DISM.exe /Online /Cleanup-Image /Restorehealth Error 87: Solution 2
Another reason for error 87 could be pending updates.
Solution
The solution is to install all and any pending updates.
To check for and install any pending update, follow the steps below:
Right-click Windows logo on the left of your task bar [1]. Then click System [2].
When Settings loads, type updates in the search bar [1]. Then select Check for updates. Check the part labelled [3] for pending updates. If any click install.
DISM.exe /Online /Cleanup-Image /Restorehealth: Frequently Asked Question
This section answers frequently asked DISM.exe questions
1. What is DISM.exe? DISM.exe (Deployment Image Servicing and Management) is a Windows command-line tool used to manage Windows images. The tool can be used to manage running operating systems or Operating System images and VHDs. 2. What Is DISM.exe /Online /Cleanup-image /RestoreHealth? This DISM command repairs the windows operating system it runs on. The /Online switch forces DISM to scan the operating system for errors – it fixes any errors. 3. Is DISM Safe To Run? DISM.exe is a legitimate Windows command that manages both online and offline Windows images. It is completely safe to run DISM.exe 4. How Long Does It Take for DISM /Online /Cleanup-image /RestoreHealth To Run? It take between 10 minutes to a few hours for DISM /Online /Cleanup-image /RestoreHealth to run. How long it takes depends on how much errors it finds and needs to fix 5. Should I run DISM or SFC First? It is recommended to run SFC first. Then, run DISM /Online /Cleanup-image /RestoreHealth. SFC checks for Windows file integrity violations and tries to fix them. However, DISM is more effective at fixing corrupt Windows Operating System files.
“DISM.exe /Online /Cleanup-Image /Restorehealth” is a very important and helpful Window command!
I hope you found this guide helpful? If you found this article helpful, kindly spare 2 minutes to share your experience with our community at Itechguides Community Forum.
However, if you have any questions regarding this article or if the steps did not fix your problem, please post your question at Itechguides Community Forum. Our team and other community members will come back to you with a fix as soon as possible.
Finally, for more Itechguides like this, visit our Windows OS Explained page.
How To Use The DISM Restore Health Command To Repair Windows
The DISM is command-line tool built in Windows to help users scan the system for corruptions and repair the image or system files correspondingly. What can the DISM tool do for you? How to use the DISM command to repair your image or system files? All these content will be covered later on this page; please read them carefully.
The SFC and DISM are two useful tools built in Windows systems for helping users scan system files and image for corruption or any other changes. Then, they will repair the problems it has found automatically: replacing the corrupted file with the correct one, repairing the underlying Windows system image, etc.
However, the SFC commands may fail sometimes, so you should turn to the DISM commands instead since they are more effective. On this page, let’s begin with the introduction to DISM and the basic DISM restore health commands.
Tip: Please be careful enough while you’re doing the DISM repair; any mistakes during this process may cause terrible results, such as losing valuable data. If that really happens to you, go to get the following recovery software or pay a visit to the Please be careful enough while you’re doing the DISM repair; any mistakes during this process may cause terrible results, such as losing valuable data. If that really happens to you, go to get the following recovery software or pay a visit to the home page to find more practical tools.
Free Download
DISM Restore Health & DISM Check Health
What Is DISM
The full name of DISM is Deployment Image Servicing and Management. DISM is a command-line tool designed for users to service, prepare, modify, and repair system images that are used for Windows Setup, Windows PE, and Windows RE (Windows Recovery Environment).
DISM.exe, also known as a DISM Image Servicing Utility file, will always target your chosen area when it’s running on your PC. It’s necessary to introduce the common DISM command switches before talking about how to use the Windows DISM tool.
How to fix DISM “the source files could not be found” in Windows 10?
DISM.exe /Online /Cleanup-Image /Restorehealth
DISM.exe cannot foresee a path unless you specify a switch in the command. What are the common DISM.exe switches and what are the functions of them?
DISM Restore Health Switches: DISM /Online /Cleanup-Image /Restorehealth
Image switch and Online switch
If you add a /Image switch to a DISM.exe command, the path will be restricted to the root directory of an offline Windows image or virtual hard disk; it’s available for DISM offline repair Windows 10. However, if you specify a /Online switch (DISM.exe /Online), the command will target files for your operating system online instead of an offline image.
Cleanup-Image switch
By giving a Cleanup-Image switch (DISM.exe /Online /Cleanup-Image), you can ask the DISM tool to do two things:
Target the running operating system.
Clean and recover operations and undertakings on the system.
Restorehealth switch
The Restorehealth switch in a DISM command tells the tool to scan the running operating system for corrupt files and attempt to repair them automatically.
DISM.exe /Online /Cleanup-Image /ScanHealth
DISM Check Health Switches: DISM /Online /Cleanup-Image /ScanHealth
The Online switch and Cleanup-Image switch in the DISM /Online /Cleanup-Image /ScanHealth command does the same work as mentioned in the DISM /Online /Cleanup-Image /Restorehealth command. Well, what will the ScanHealth switch do? Actually, it tells the Windows DISM tool to execute a progressive scan for finding problems in the operating system.
How to Run DISM to Restore Health or Check Health
The following steps for DISM restore health or check health are executed on a Windows 10 computer.
Step 1: Run Command Prompt as Administrator
Click on the Start button in the lower left corner. Also, you can press the Start key on the keyboard. Scroll down in the Start menu to find the Windows System folder. Expand the folder and right click on Command Prompt. Select More -> Run as administrator.
Step 2: Type Correct Command and Execute It
To let DISM tool check the system for corruption and fix any problems it finds automatically, you should type DISM /Online /Cleanup-Image /RestoreHealth and press Enter .
and press . If you only want to perform a quick check, please type DISM /Online /Cleanup-Image /CheckHealth and press Enter .
and press . To perform a more advanced scan to check if your OS image has any problems, you should type DISM /Online /Cleanup-Image /ScanHealth and press Enter.
How to fix the problem when DISM failed on a Windows computer?
How to use DISM Command to Repair Windows — LazyAdmin
Windows system files sometimes get corrupted, which can result in errors, problems with updating Windows, or even preventing Windows from booting at all. In these cases, we can often repair Windows using the built-in DISM command.
When system files are corrupt or missing Windows might not start at all anymore. You will get a blue screen of death (BSOD), with an error indicating what the issue is. It could be a driver error, but also broken system files can prevent Windows from starting.
In this article, I am going to explain how to use the DISM Command and the restorehealth function. Also, I will explain briefly how to boot from the installation media.
How to use the DISM Command
DISM stands for Deployment Image Service and Management and is a built-in command-line tool that can be used to create Windows system images. But today we are going to use the tool to repair Windows.
To use the tool we will need to have access to the command line interface of Windows. This can be done through Command Prompt, PowerShell, or Windows Terminal. But more importantly, we need to be able to start Windows.
If your computer doesn’t boot at all, then you can’t access the command-line interface. To solve this you can use a Windows Installation medium that you can easily create with an 8GB thumb drive. Follow this guide for more information on how to boot into safe mode.
The DISM command will by default use your Windows Updates files to repair any corrupt files. If your Windows updates files are also corrupted or when DISM is unable to repair the files with it, then you can use a Windows installation media as a source. Follow the steps described in this article to create a Windows installation USB drive.
DISM Online Cleanup Image Restorehealth
To restore the health of your Windows installation we first need to check for any corrupted files. For this, we are going to use the command CheckHealth and ScanHealth first.
If you are able to login to Windows, then open a command-line interface in elevated mode:
Right-click on Start (or press Windows key + X) Choose Command Prompt (admin) (or Windows PowerShell (admin), or Windows Terminal (admin)
Otherwise, follow the steps described here to boot Windows from USB and open the command prompt.
Follow the steps below to restore the health of your Windows installation. Some commands can take a couple of minutes, just give it some time:
Check the Health of Windows System files
We are first going to do a quick scan of the Windows system:
DISM /Online /Cleanup-Image /CheckHealth Advanced system scan
The next step is to do a more advanced system. ScanHealth will check the component store and report any corruption in the log file: C:\Windows\Logs\CBS\CBS.log
DISM /Online /Cleanup-Image /ScanHealth
Repair Windows with DISM Online Cleanup Image Restorehealth
When the ScanHealth or CheckHealth commands found any corruption then we can repair it with the RestoreHealth command:
DISM /Online /Cleanup-Image /RestoreHealth
Reboot It can take some time for the DISM tool to restore your Windows Image. Make sure that you let it run. The progress bar sometimes stops for a couple of minutes, just give it some time.
Once completed, reboot your computer.
Use an Installation Media to Restore System Files
Sometimes DISM is unable to repair your Windows installation with the files that are on your hard disk. In these cases, we can specify an installation source that can be used to repair your Windows files. Make sure that you have created a recovery USB for this.
If you can still access Windows you can also download the Windows ISO file and mount it by double-clicking on the file. You can then refer to the ISO file instead of the USB drive.
With the ISO file or USB drive connected enter the following command to repair Windows:
# Replace the D:\ in the source path with the correct drive letter of your ISO file or USB Drive DISM /Online /Cleanup-Image /RestoreHealth /source:D:\Sources\Install.wim /LimitAccess
DISM Online Cleanup Image Restorehealth
Repair the current Windows Installation
The steps above repair the Windows image that is stored on your computer. But the actual Windows installation isn’t repaired yet. So you might get errors in Windows or are unable to boot Windows at all.
So to repair the Windows installation we need to run the SFC command tool. Use the methods described earlier to open a command prompt or PowerShell window with elevated permissions (run as Administrator).
Run the command below to repair the files:
sfc /scannow
This command will take some time, let it complete and reboot your computer once done. Sometimes you will need to repeat the command to fully repair all the corrupted files.
sfc /scannow
Free up disk space with DISM
Besides repairing your Windows installation can DISM also be used to free up disk space. Windows will keep a copy of all Windows updates that it ever installed on your computer. This is needed so you can uninstall updates in case of a problem.
But all those updates can take up quite a lot of disk space. With the DISM Command, we can remove the old updates. Keep in mind, that you can’t uninstall Windows Updates anymore after removing the update files!
Analyze the Component Store
The first step is to analyze the Windows Update component store. The command below will go through all the update files to see what can be removed.
Right-click on start (or press Windows key + X) Choose Windows PowerShell (admin) or Windows Terminal (admin) Enter the command below:
Dism /Online /Cleanup-Image /AnalyzeComponentStore
Press Y to reboot your computer to start the cleanup process.
Cleanup old files manually
On Windows 10 you might not get the option to restart your computer. In this case, we will need t start the clean-up manually with the command below:
Dism /Online /Cleanup-Image /StartComponentCleanup
Once completed use the command below to reduce the size even further:
Dism /Online /Cleanup-Image /StartComponentCleanup /ResetBase
The ResetBase command can take some time, just let it complete.
Wrapping Up
The DISM command is a great tool to repair your Windows installation or to clean up your old Windows updates. Make sure that you run the SFC /Scannow command once completed to repair also the corrupted Windows installation.
I hope you found this article helpful, if you have any questions, just drop a comment below.
How to Repair a Windows Image Using the DISM
There are different ways to repair a Windows image, and it depends on whether the image is offline or online. Repairing an offline Windows image is possible in a VHD or WIM file, while an online Windows image will try to repair itself first when it’s not functioning as intended. The repair source for this uses the same one as Features on Demand, and Group Policy settings determine it. When using DISM to try and repair an offline or online Windows image, you can specify the additional repair source locations by using the /Source argument alongside the /RestoreHealth argument. If you need to scan and repair an online image, you can also use the sfc /scannow command to do a quick check. On the other hand, you also have the option to do a more thorough check by using DISM /Cleanup-Image.
The first step is to make sure that an image is still repairable. Here’s what you need to do:
You must first do a quick scan to see if the image has been corrupted. Open the Command Prompt on your PC and enter Dism /Online /Cleanup-Image /ScanHealth. The scan should only take a few minutes.
You can use the command Dism /Online /Cleanup-Image /CheckHealth to see if your PC detects any corruption on the image. When using this sfc argument, the DISM tool will inform you if the Windows image is healthy, repairable, or non-repairable. If it’s the latter, you’ll need to get rid of the image and start from scratch. However, if it’s repairable, you can proceed to the /RestoreHealth argument to begin repairs.
Repairing a Windows image follows the same process above. Open your PC’s Start menu, go to Command Prompt, and enter the right command. If you’re trying to repair an offline image with the help of a mounted image as a repair source, the proper command to use would be Dism /Image:C:\offline /Cleanup-Image /RestoreHealth /Source:c:\test\mount\windows. However, if you’re repairing an online image with your sources, enter this command instead: Dism /Online /Cleanup-Image /RestoreHealth /Source:c:\test\mount\windows /LimitAccess.
Note that the default location for repair files is the same as Features on Demand if you don’t specify a /Source. You can read more about it here. On the other hand, specifying two or more sources will ensure the same results, but only the files from the first location will be copied. If you want to ensure that the DISM tool doesn’t repair the images using Windows Update as a source, it’s important to use /LimitAccess.
Now, there are some instances wherein an image gets corrupted while the DISM tool tries to modify it. In such cases, you can use the command Dism /Cleanup-Mountpoints to fix it.
Learn more about repairing a Windows image with the DISM tool at Microsoft.com.
키워드에 대한 정보 dism restore health
다음은 Bing에서 dism restore health 주제에 대한 검색 결과입니다. 필요한 경우 더 읽을 수 있습니다.
이 기사는 인터넷의 다양한 출처에서 편집되었습니다. 이 기사가 유용했기를 바랍니다. 이 기사가 유용하다고 생각되면 공유하십시오. 매우 감사합니다!
사람들이 주제에 대해 자주 검색하는 키워드 DISM /Cleanup-Image /RestoreHealth \u0026 SFC /ScanNow not Working Windows 10, 8 \u0026 7 | Fix All Errors
- how to fix
- sfc /scannow fails to fix
- sfc scannow windows 10 not working
- dism error 2 unable to access the image
- dism error 0x800f081f the source files could not be found
- dism failed. no operation was performed
- dism error
- windows resource protection could not perform the requested operation
- Windows Resource Protection could not start the repair service
- sfc /scannow fails
- dism error 87
- dism error 2
- windows 10
- windows 8
- windows 7
- computer
- laptop
DISM #/Cleanup-Image #/RestoreHealth #\u0026 #SFC #/ScanNow #not #Working #Windows #10, #8 #\u0026 #7 #| #Fix #All #Errors
YouTube에서 dism restore health 주제의 다른 동영상 보기
주제에 대한 기사를 시청해 주셔서 감사합니다 DISM /Cleanup-Image /RestoreHealth \u0026 SFC /ScanNow not Working Windows 10, 8 \u0026 7 | Fix All Errors | dism restore health, 이 기사가 유용하다고 생각되면 공유하십시오, 매우 감사합니다.